The Water Storage Tank and the Heat Exchangers
I followed
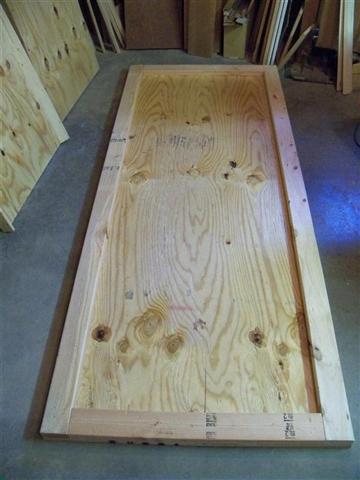
Gary Reysa's design pretty closely for the plywood water tank. I started with a 3/4" plywood sheet cut to the desired size — in my case 8 ft long and 38" wide (it needed to fit in a space in my basement shop). The finished tank would hold close to 300 gallons, following a common ratio of about 1.5 gallons per square foot of collector area. I screwed and glued a 2x4 border on top of the plywood:
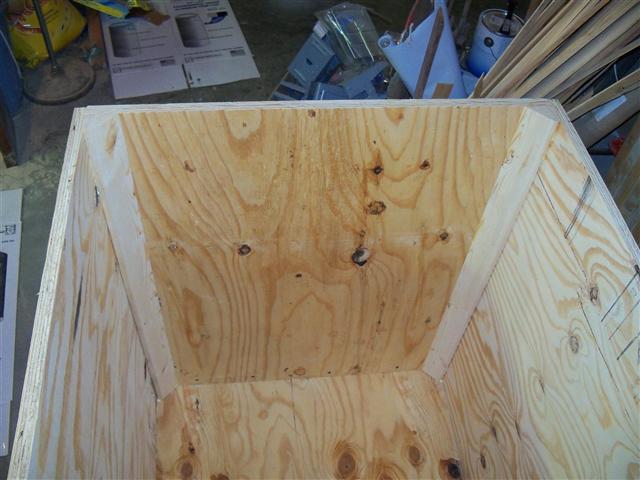
The next photo shows one of the end panels. The angled pieces allow for better insulation at the corners — rather than having wood bridge from the inside all the way to the outside, the angles allow me to have a layer of foam between the water and the outside.
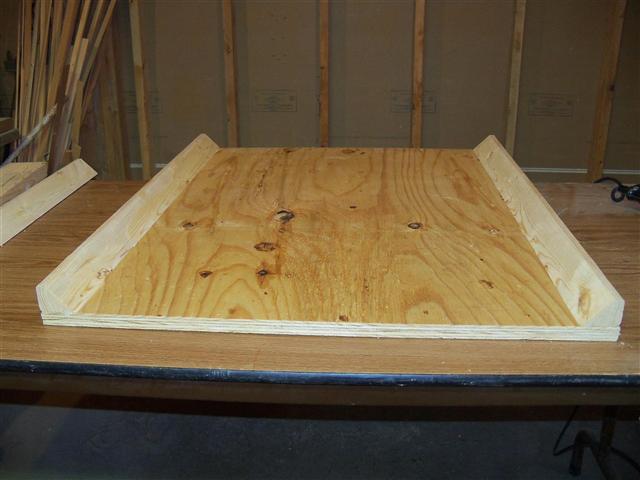
The angled corner pieces are screwed and glued to the plywood end panels:
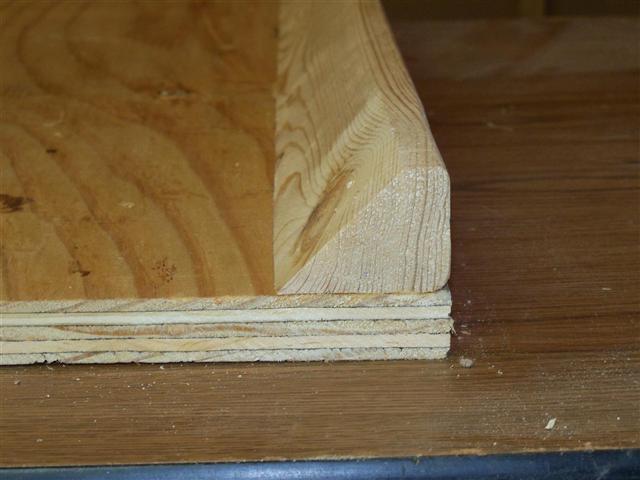
After the foam board is added, you can see that there is a good amount of insulation between the inside of the tank and the wood:
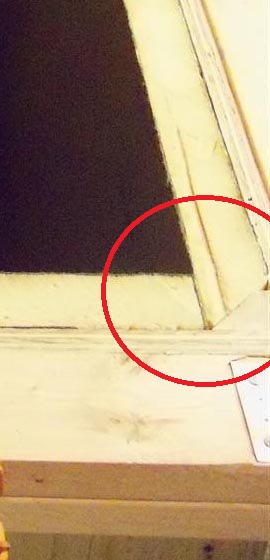
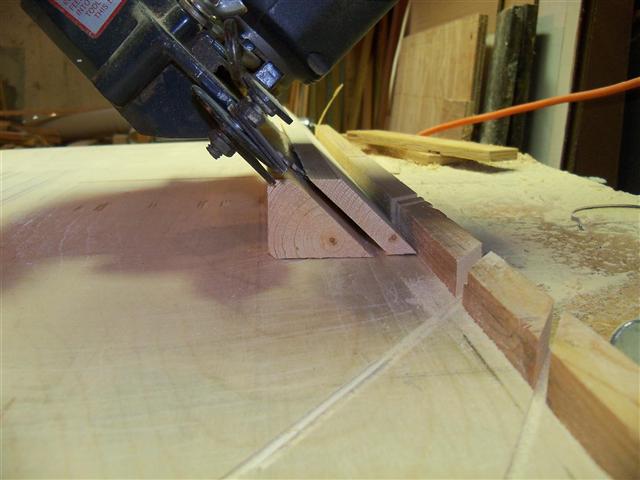
I made two of the angled corner pieces from a 2x4 on the radial saw. Here I am trimming off the extra after already getting one corner piece from the 2x4:
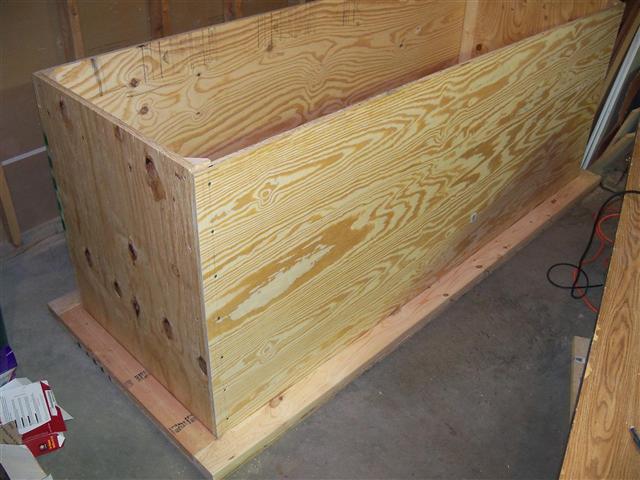
The end panels and the longer side panels are set inside the 2x4 frame on the bottom plywood. I screwed into the angled corner pieces from the side panels. Every joint was glued and screwed for strength.
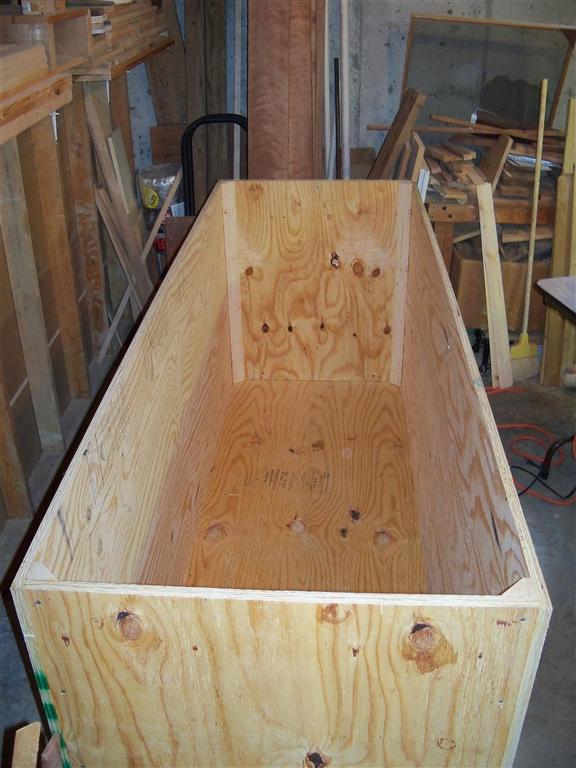
Now I added the 2x4 top rails, screwing and gluing:
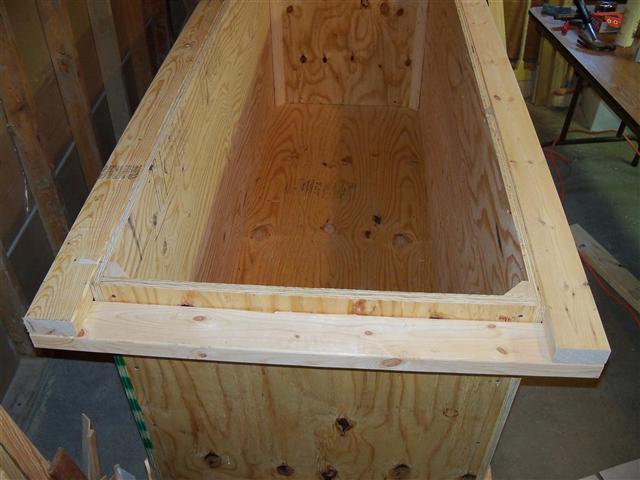
This leaves a gap on the ends, which gets filled with another 2x4 to provide a level surface for the top:
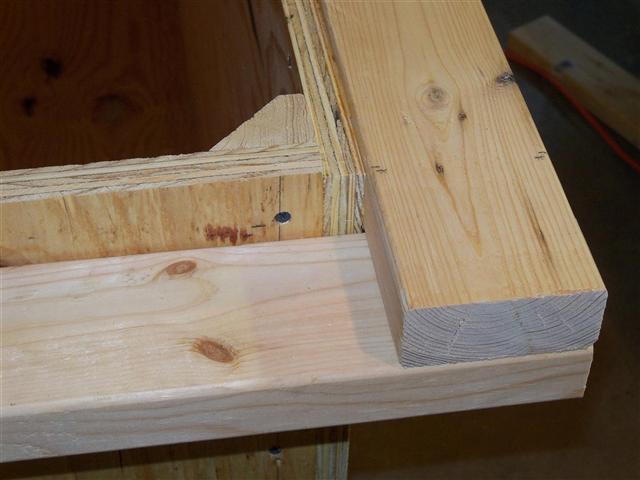
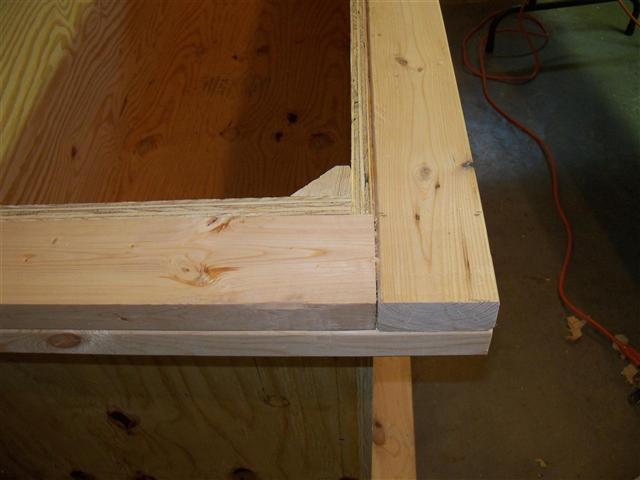
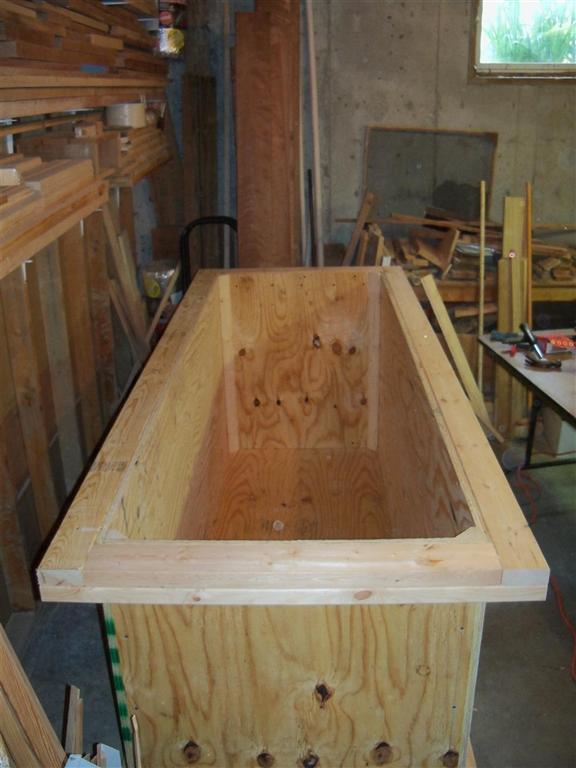
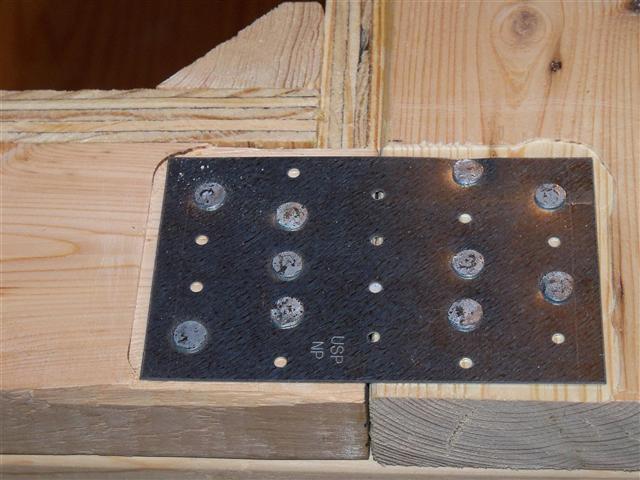
And the extra 2x4s on the ends are tied to the side 2x4s with metal plates for strength. I relieved the tops of the 2x4s with a router to provide a flatter surface in the end:
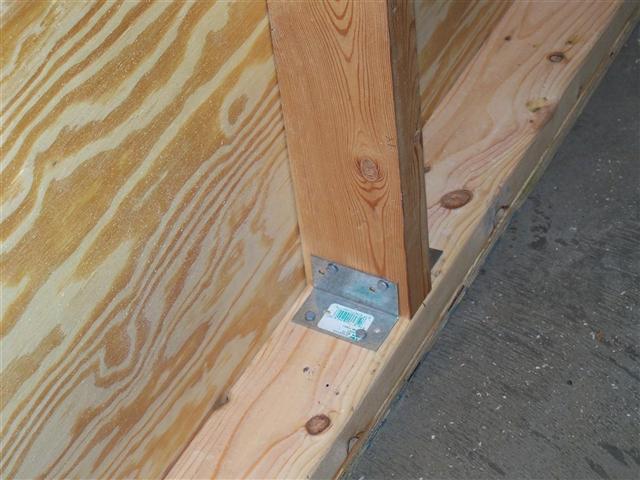
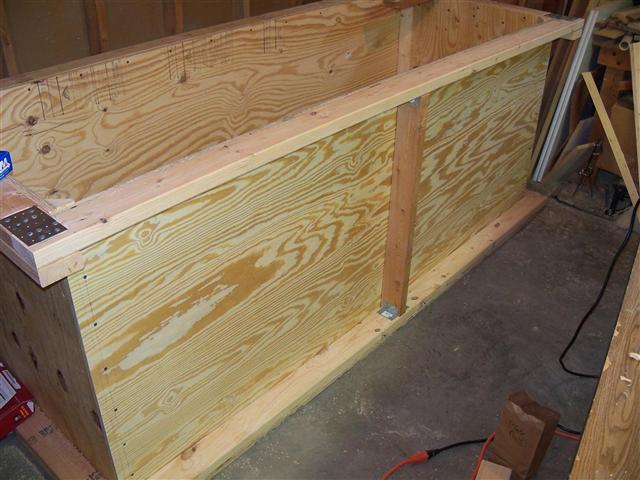
In the center of each long side of the tank, I added a vertical 2x4 brace and used metal fasteners:
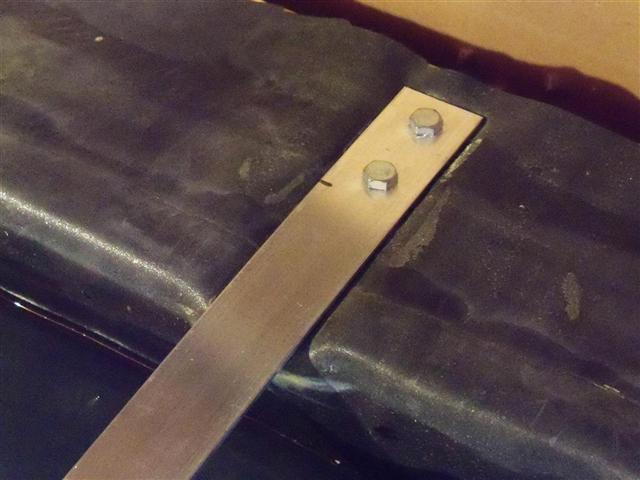
To ensure that the pressure of the 300 gallons will not push the sides out, a couple of galvanized bars would be added after the pond liner was installed. I used a router to let these into the 2x4s, so that I would preserve a flat surface for the top for easier sealing of the tank.
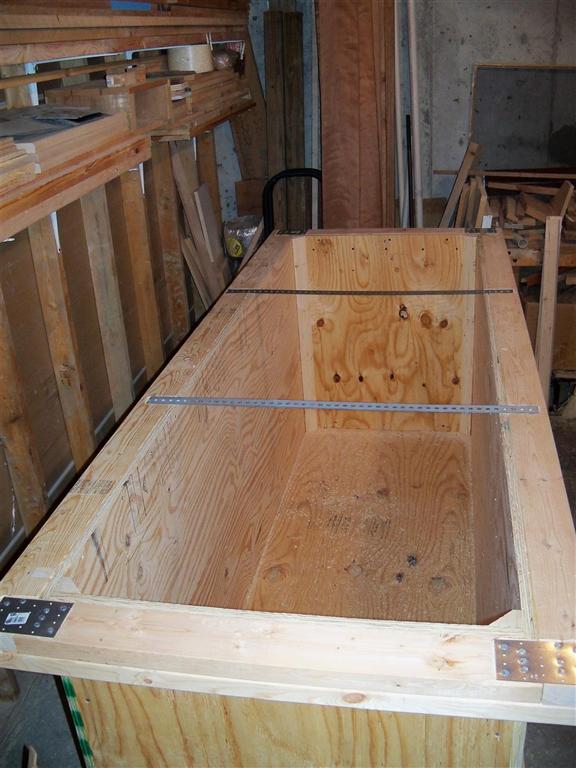
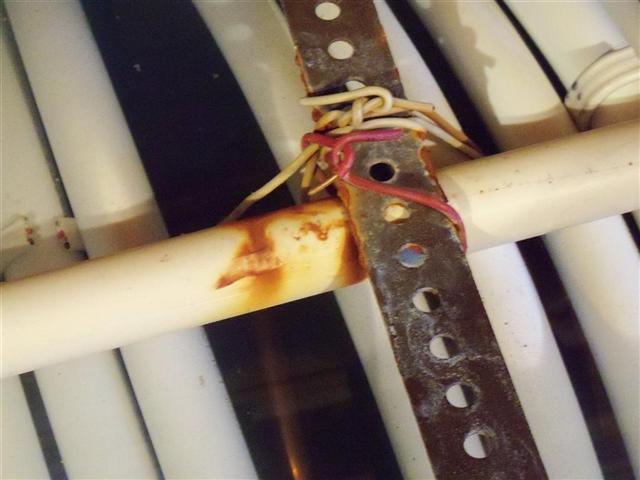
I painted the bars with Rustoleum — but in the hot moist environment of the tank, one of the bars started rusting pretty badly after a few weeks — so I later had to remove the top plates and replace the galvanized with 1/8" thick aluminum. Here's the rust that appeared on one of the straps after just a few weeks:
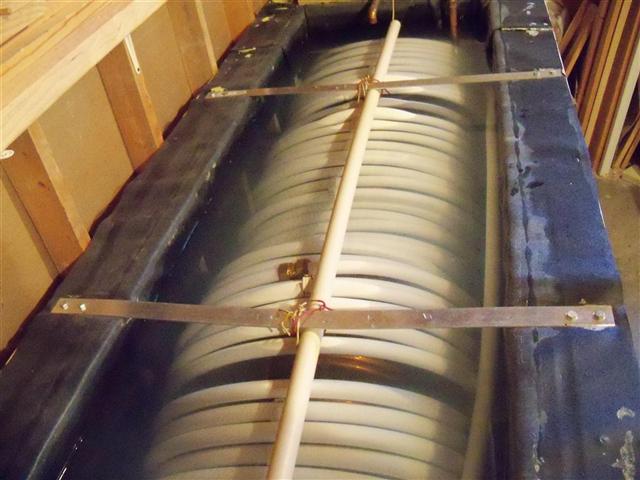
Later on, after replacing the steel straps with aluminum:
2" polyisocyanurate foam insulation sheets are glued and braced on the interior — bottom and sides. I used 4x8 sheets recycled from a roofing job. Polyisocyanurate has a higher heat rating than regular polystyrene foam — important for inside the tank. This material can be found at most building supply stores under various trade names (including, I believe: Celotex GA3000 or Tuff-R, Kooltherm, Atlas R-Board, Thermax), but check to be sure.
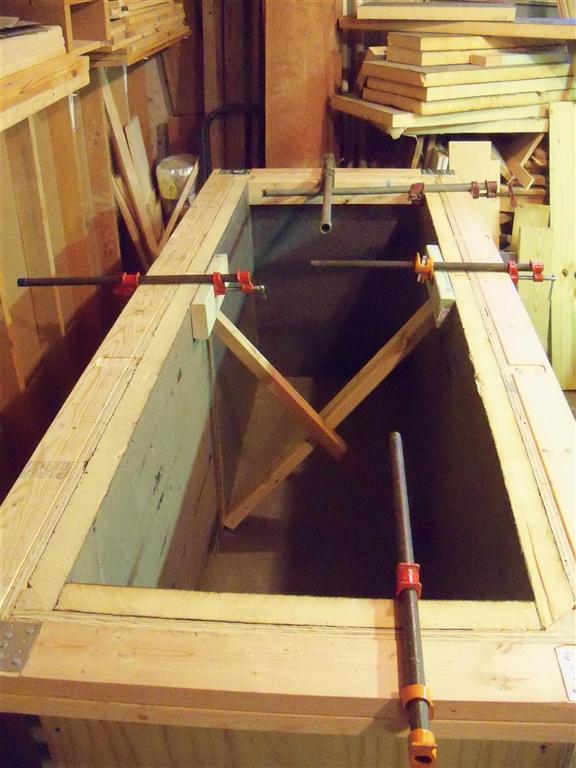
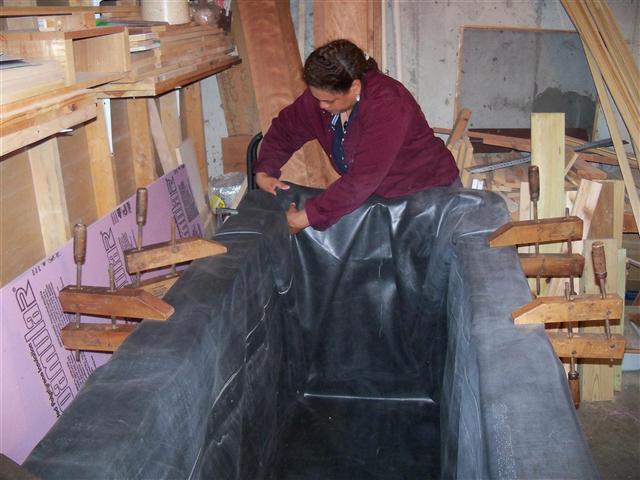
A large sheet of EPDM pond liner was cut to size for the tank (be careful to calculate the size you will need before cutting). Folding the heavy material into the corners is a bit tricky, but the material is forgiving and if you make some big folds at the corners — kind of like wrapping a present — it works out alright. I used clamps on the sides to keep the material where I wanted it while Sherry and I worked on the corners:
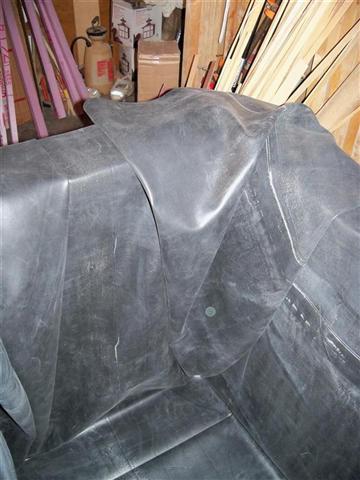
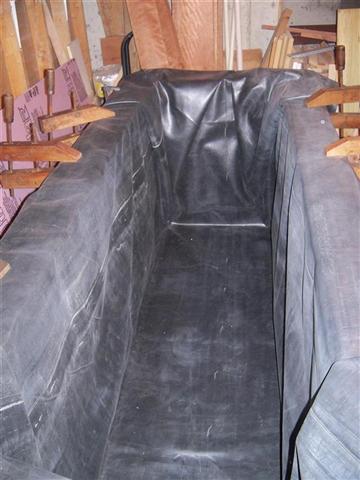
Looks messy, but folds like this are good enough. It's important that you leave sufficient material in the tank so that the weight of the water will not be straining the fabric at the bottom and corners.
The tank has two heat exchangers — one 300 ft of 1" pex-al-pex, and the other 100 ft of 1/2" flexible copper tubing.
The pex is for domestic hot water (DHW). The pipe holds almost 12 gallons inside its length, which generally has ample time to rise to the full temperature of the tank (target is 140 degrees) between uses — showers, clothes washing, dishwasher. As such, the water that reaches the backup propane hot water heater will often be fully pre-heated, so the burner will not come on. (Depending on how I decide to use the harvested heat in the winter with the radiant floor, it may be that the tank stays a lot cooler than that in the winter — but I figure that any solar BTUs that are utilized are worthwhile, regardless of how I apportion them. Spring through Fall, I expect the tank to at its maximum design temperature most of the time.)
The copper allows for quicker heat transfer, and will be hooked up to the radiant floor heating system as pre-heat.
I made the coils so that the copper coil is tighter and fits inside the pex coil.
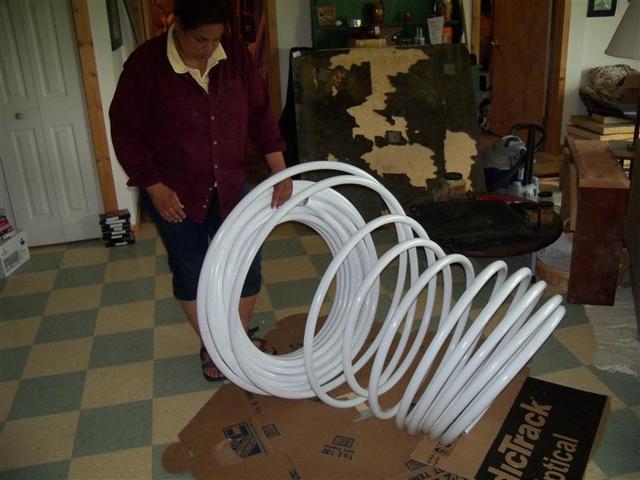
The pex-al-pex came in a coil of larger diameter than I needed, so we had to form it into a tighter coil. Pex-al-pex (with a thin layer of aluminum sandwiched between pex layers) is known for maintaining its bend much better than regular pex. But this is a matter of degree — it was still a challenge convincing it to stay more tightly wound:
At first we tried taping the tighter coils as we went, but that was too much of a hassle:
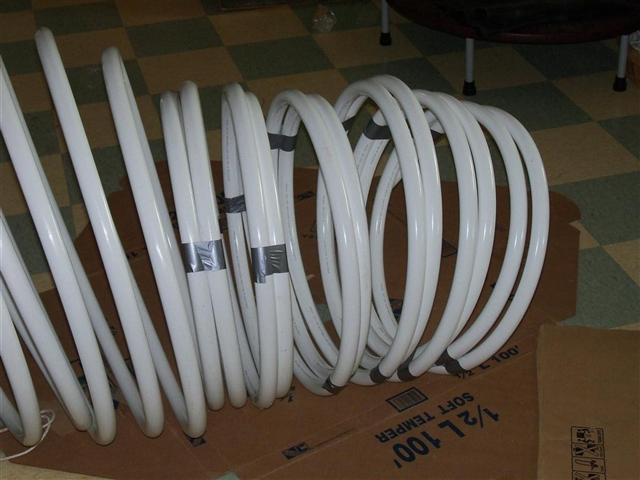
In the end we used two people — one to hold the tighter coils in place while the other turned and bent the larger coil into a tighter curve. It was amazingly sweaty work, a lot of wrestling with the pipe, like playing an intense game of Twister:
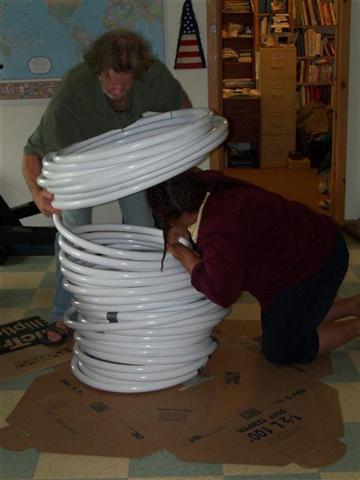
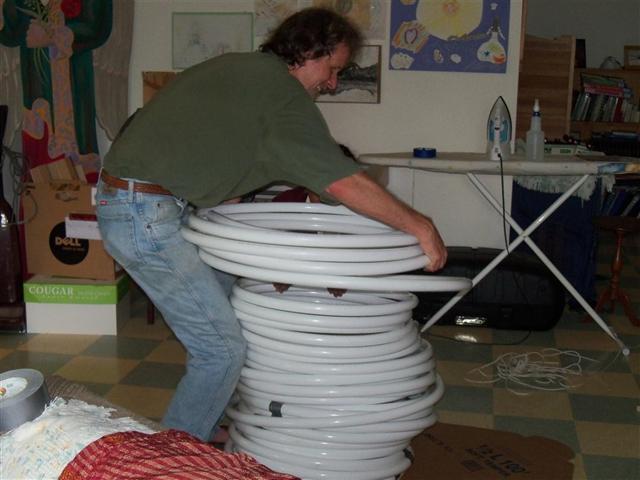
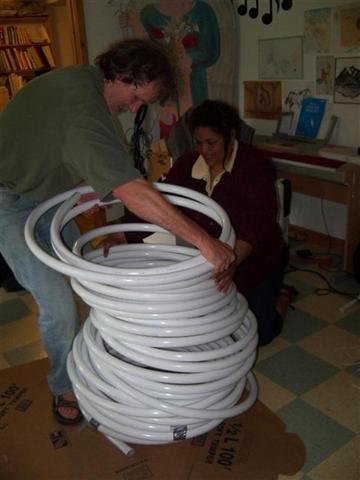
The pex-al-pex still wanted to move partially back to its old shape by the next day. So we tightened the coil more than once until it finally settled down.
The copper tubing was easier, as it holds its shape. I grabbed a 5 gallon bucket as a mold, and we just wrapped it around:
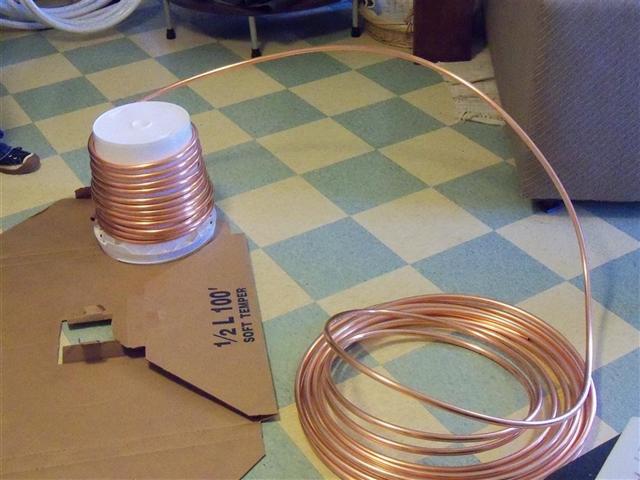
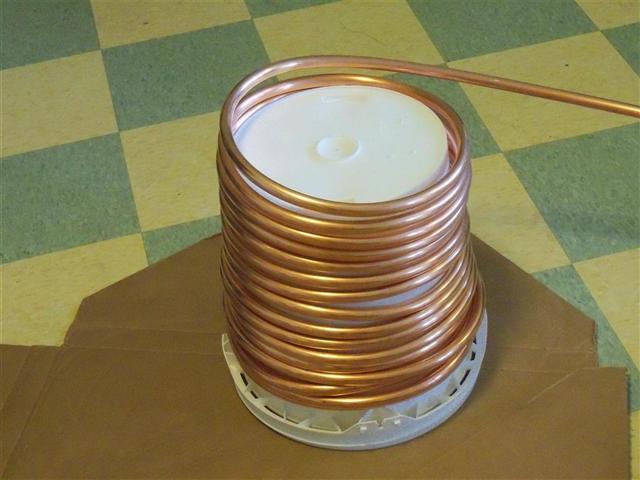
When we got to the top, we just added a second bucket and kept going:
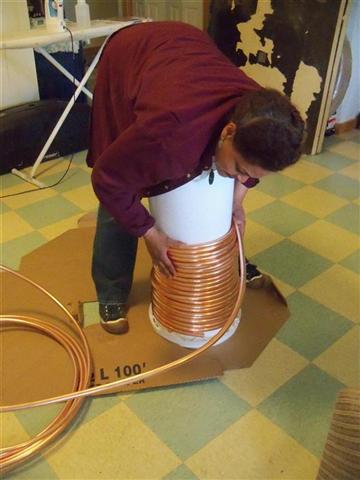
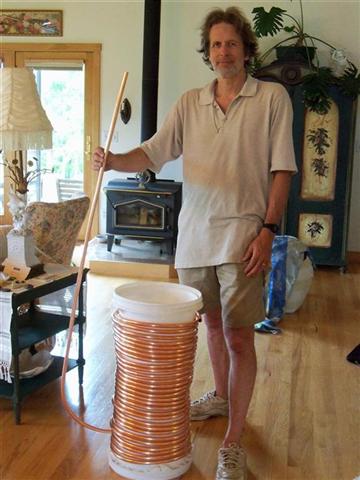
In the end, it looked like a spool of thread with a big copper needle attached:
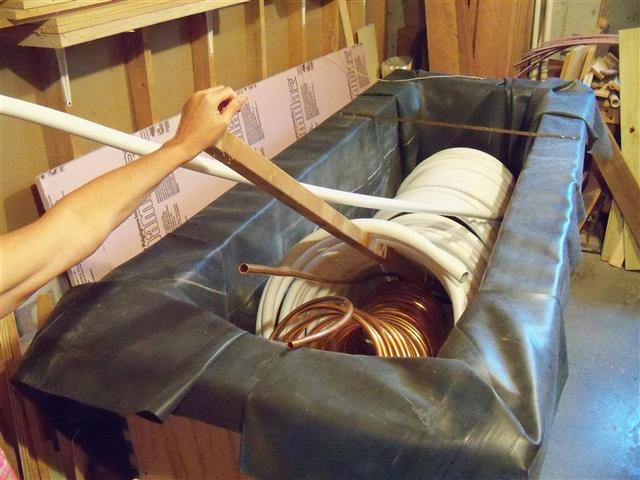
I inserted the copper coil inside the pex coil, and maneuvered it into the tank. At this point, the tank had one of the galvanized bars bolted on — the other was left off to allow the coils to get in:
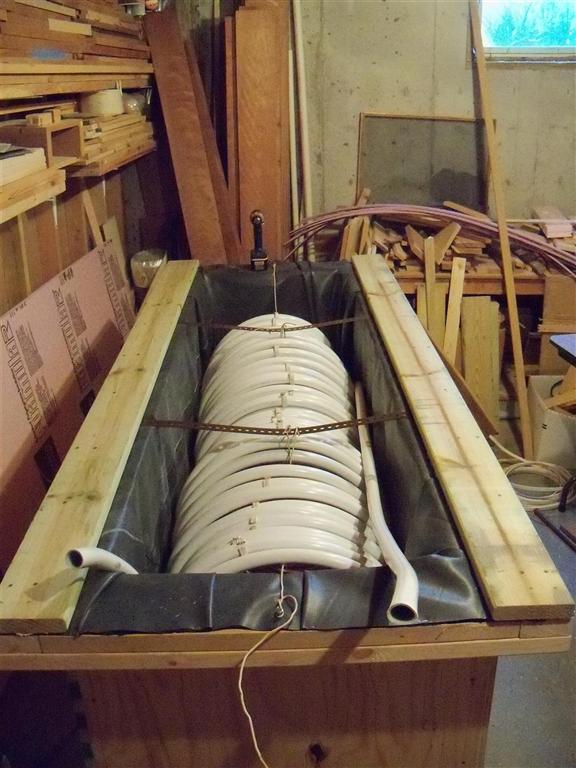
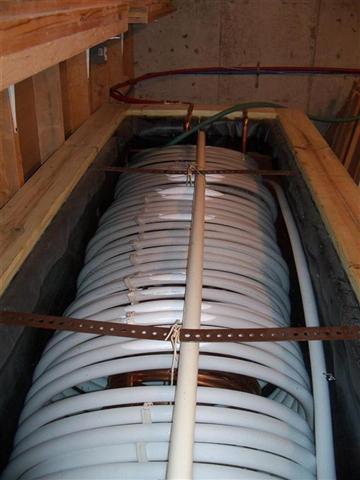
I did not want the coils to end up at the bottom of the tank, since the hottest water will be at the top, so I suspended them from the ends of the tank and from the support bars with heavy electrical wire. I also used small pieced of romex around every other turn of the pex coil to keep them slightly separated to allow better heat transfer from the water:
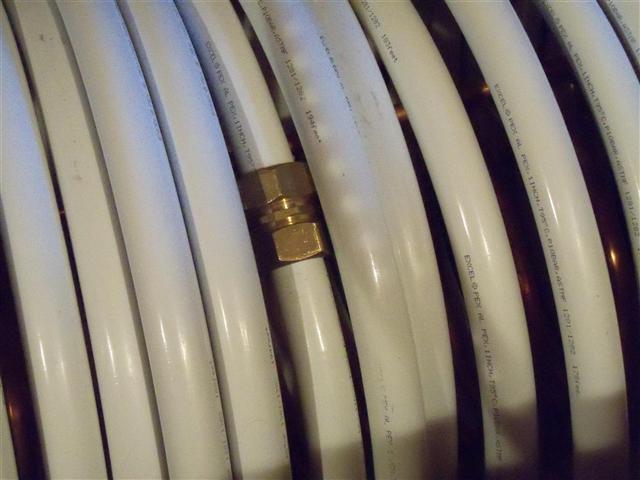
The pex-al-pex actually came in one 200 ft and one 100 ft roll, so I had to splice them with a compression fitting:
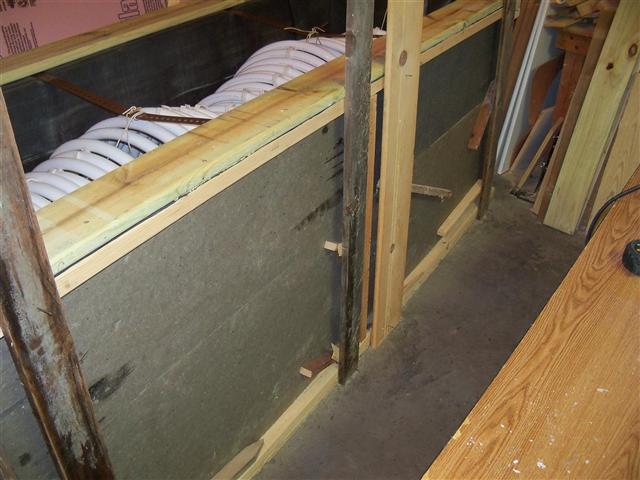
I decided to add two more inches of foam insulation to the outside of the tank, for a total of 4" on all sides and the top. The tank also rests on a 1" foam board on the concrete floor — so it has 3" of foam at the bottom. Here I am bracing the outer foam to let the adhesive set:
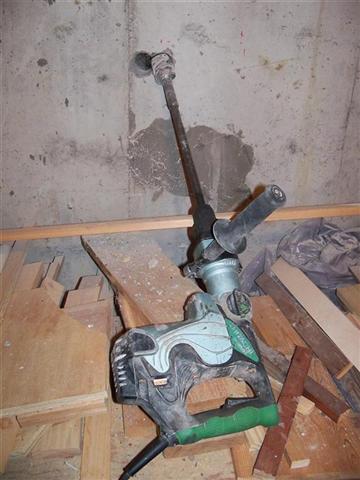
I rented a big hammer drill to drill through the concrete wall in the basement. This place only had a solid 2 1/4" carbide bit, not a core bit — but it went surprisingly easily. In fact, I had to drill another set of holes later, lower down, and that time I used a core bit — and it went at least as slowly as the solid bit, plus there was the hassle of having to empty the core bit from time to time.
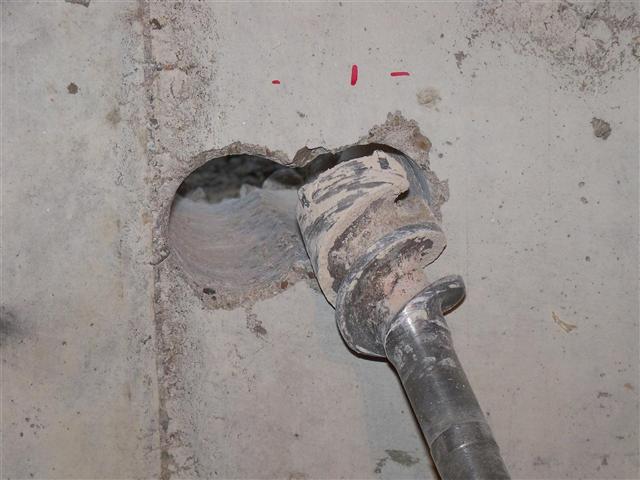
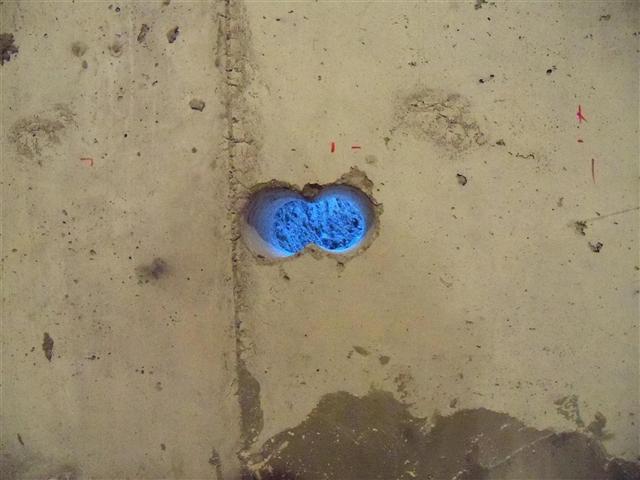
I drilled two holes partly overlapping to accommodate the two pipes. Here you see eerie blue daylight:
The holes from the outside:
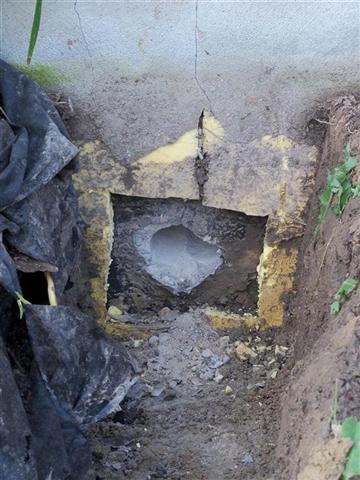
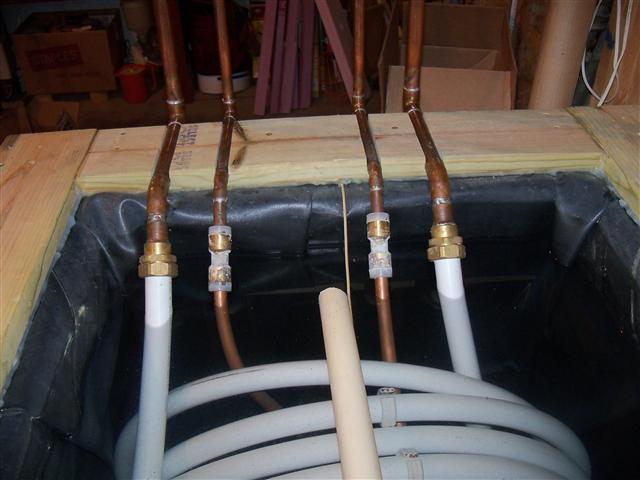
Here is the plumbing that comes out of the tank. The 3/4" copper will connect to the backup hot water heater at one end , and at the other end to the 1" coil of pex-al-pex. The cold water coming into the house will pass through the pex-al-pex heat exchanger before going to the propane water heater. The 1/2" copper will connect to the in-floor radiant heat system at one end, and to the coil of 1/2" copper in the tank at the other end:
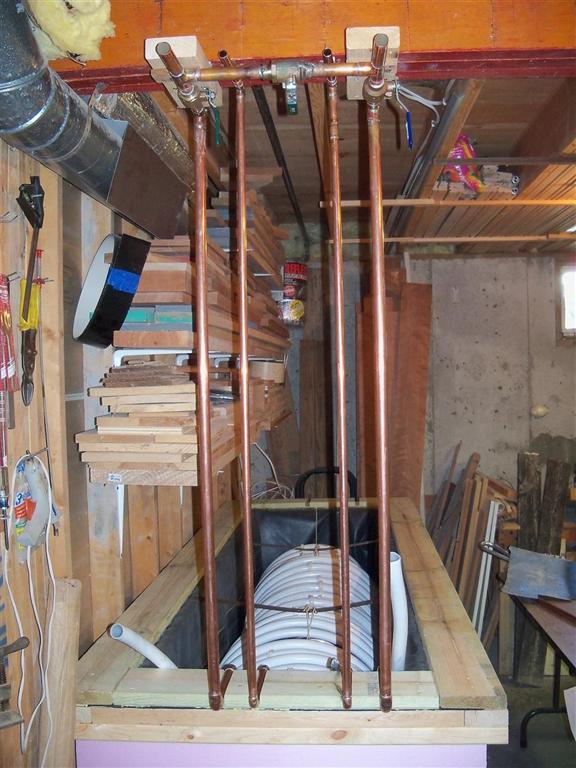
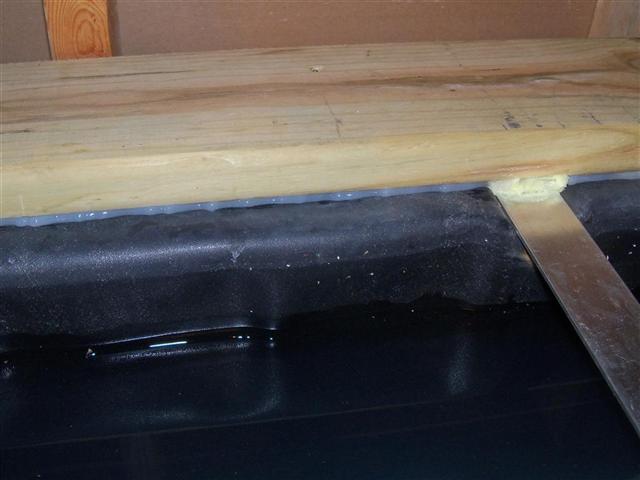
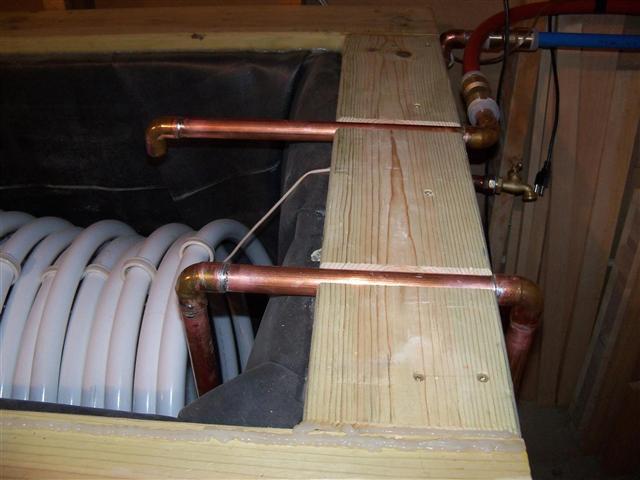
Notice above that I have added a top plate all around the tank, to provide a flat surface for the tank top to seal against. I used treated deck lumber, 1-1/8" thick x 5-1/2" wide. I used that thicker lumnber so I could cut grooves in the boards to let the copper pipes through without cutting all the way through. The EPDM liner underneath it provided an uneven surface, because of all the folds. So I applied a bead of Great Stuff foam as a seal and then screwed down the boards. I also routed the top plates at the spots where the bolts on the metal support straps stuck up, so they would not hold the top plate up. And I cut grooves in the top plates for the copper pipes to sit in (again, to allow a flat top surface). Later I will caulk around the pipes in these grooves. After the top plates were on, I sealed around their inner edges with silicone caulk.
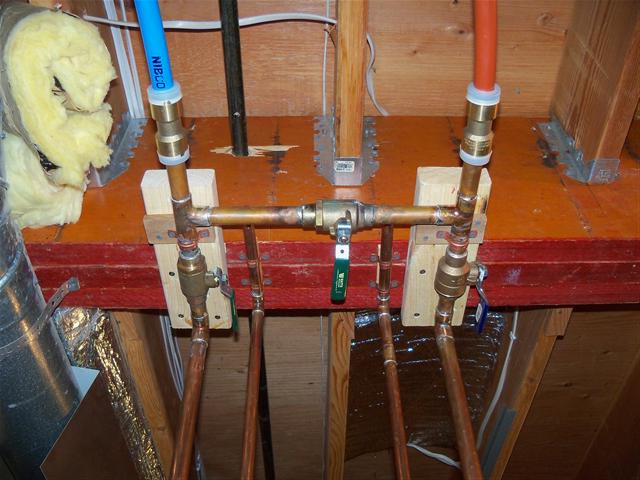
Isolation valves on the 3/4" copper allow the tank to be bypassed if necessary (the 1/2" copper will have a similar bypass). I used Watts couplers, similar to Sharkbite, to go from copper to pex:
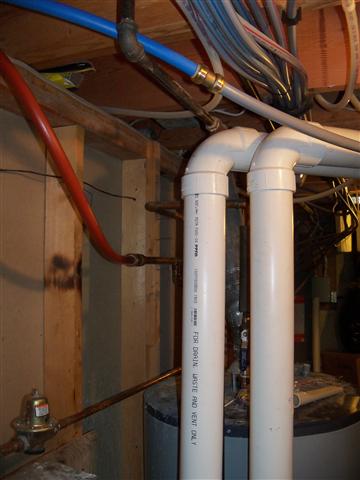
Tying in to the existing propane water heater was also done with Watts connectors, one to copper and one to the incoming cold water line which was gray plastic tubing:
I used 45 degree elbows at the lip of the tank, compression fittings to connect the pex-al-pex, and Sharkbite couplings to connect to the 1/2" copper in the tank.
At the other end of the tank is the pump and the pipes that go to the collector. I used a U-tube arrangement to keep water in the line above the pump (to keep it primed between uses). There are isolation valves near the top of each end of the U-tube.
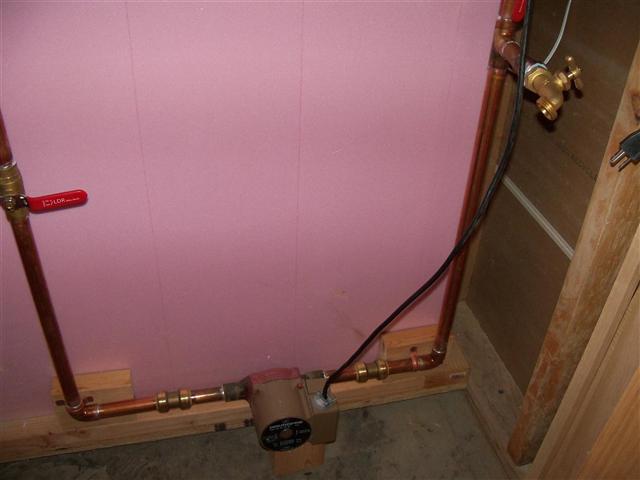
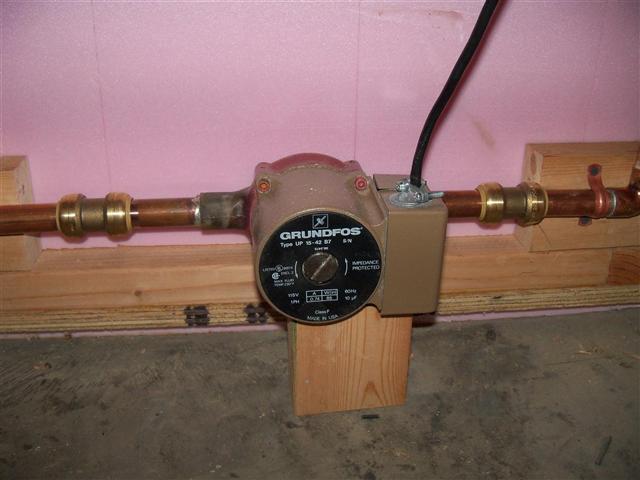
I had an old Grundfos 15-42 bronze pump left over from our radiant floor system. It was a sweat connection, so I used Sharkbites to make it removable. (As I say in the Lessons Learned section, I had to replace this pump with a larger one later to get sufficient flow through my long runs of 3/4" CPVC to the collector.)
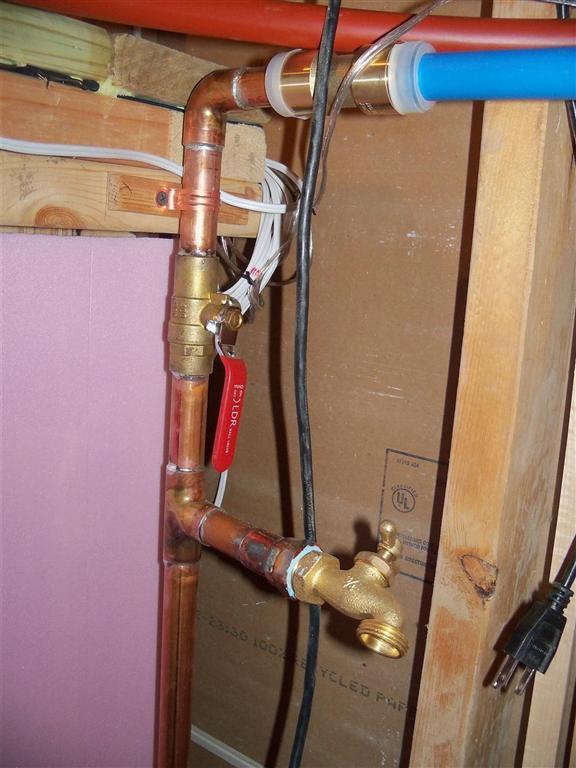
On the collector side of the U-tube, I added a hose bib for two reasons. (1) It allows the U-tube to be filled with water to prime the pump — by closing the ball valve above it, opening the other, and attaching a hose. (2) It allows me to send water through the collector at city water pressure — via a garden hose, by opening the valve above the hose bib and closing the other one — which was useful when I was diagnosing some problems.
The copper supply line draws water from near the bottom of the tank. The copper return line drops water above the water line (which is critical for a drainback):
I used Sharkbite elbows at the basement opening between CPVC and pex:
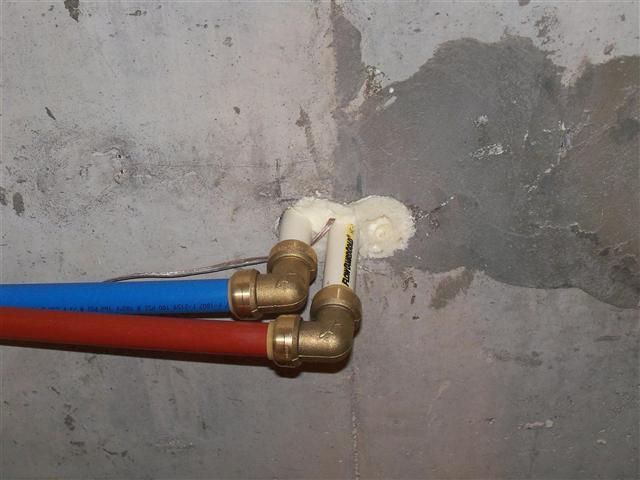
Here are the short pex runs from the CPVC to the tank. I used some foam insulation to keep the pipes away from the concrete (cold in winter). I connected the pex to the copper tank plumbing with Watts couplings, similar to Sharkbite, which proved very handy as I had to connect various things there as I did system tests.
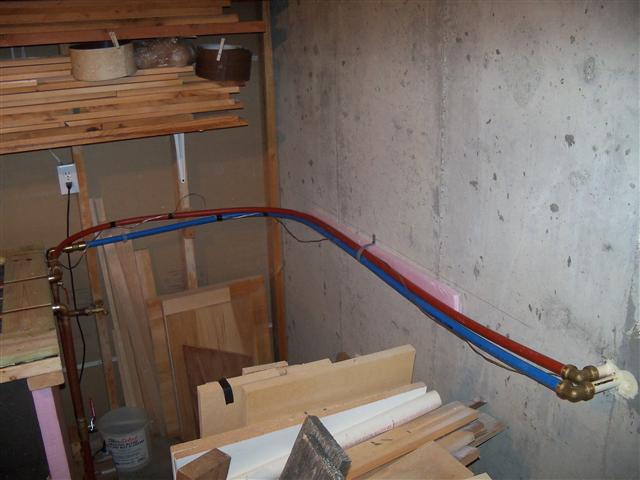
When I first filled the tank, I saw that the pex-al-pex coil was going to float. Even with water in the coil it is a little lighter than water:
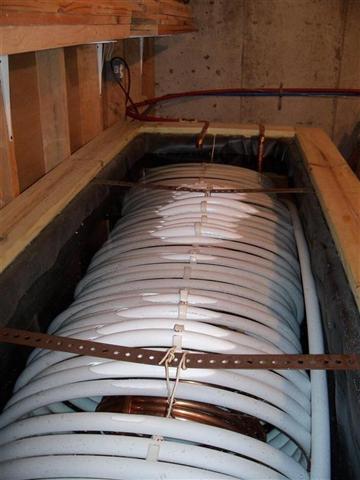
So I added a pvc pipe just to keep the coil a bit below the metal straps, and below the final water line (here the water was not all the way up yet):
The top of the tank is a sheet of EPDM, facing the water, glued to a sheet of 2" polyisocyanurate foam (better heat stability) glued to a sheet of 2" polystyrene foam, glued to a sheet of 3/8" plywood. I will screw it down with long hex lag bolts and big fender washers. Keeping the lid tightly sealed will reduce evaporation and heat loss. It's amazing how much steam comes off a tank of water at 160 degrees.
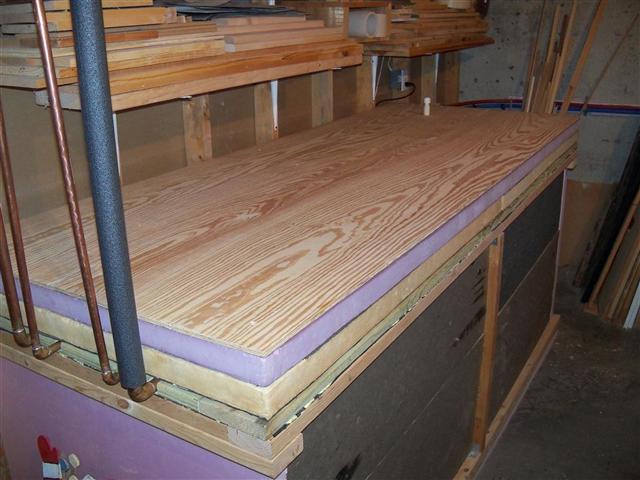
The white cpvc pipe emerging from the tank lid, at the rear in the photo, fulfills a few functions:
- It allows a dip-stick reading of water height in the tank, by removing the loose cap on top. Some evaporation will occur.
- It allows topping up the tank when necessary, with a funnel.
- It allows pressure equalization, through a small hole drilled in the pipe cap.
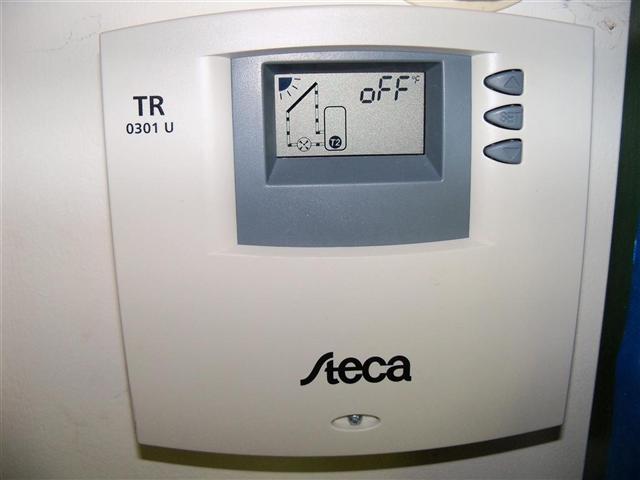
I bought a Steca controller (below), a lug sensor for the tank, and a probe sensor for the collector from altestore.com. The controller was easy to hook up. I brought in power from the rear, and also connected romex to the outlet near the pump on my tank through the rear of the controller. Wires for the two sensors also came in from the rear. The controller senses the temperature in the tank (near the bottom — I put the sensor under the EPDM near where the collector supply pipe gets its water) and in the collector (I attached the sensor to a return pipe via silicone caulk), and only turns on the pump when the collector is hotter than the tank water.
 Next page (Trench) >>
 The next photo shows one of the end panels. The angled pieces allow for better insulation at the corners — rather than having wood bridge from the inside all the way to the outside, the angles allow me to have a layer of foam between the water and the outside.
 The angled corner pieces are screwed and glued to the plywood end panels:
 After the foam board is added, you can see that there is a good amount of insulation between the inside of the tank and the wood:
 I made two of the angled corner pieces from a 2x4 on the radial saw. Here I am trimming off the extra after already getting one corner piece from the 2x4:
 The end panels and the longer side panels are set inside the 2x4 frame on the bottom plywood. I screwed into the angled corner pieces from the side panels. Every joint was glued and screwed for strength.


 Now I added the 2x4 top rails, screwing and gluing:
 This leaves a gap on the ends, which gets filled with another 2x4 to provide a level surface for the top:


 And the extra 2x4s on the ends are tied to the side 2x4s with metal plates for strength. I relieved the tops of the 2x4s with a router to provide a flatter surface in the end:
 In the center of each long side of the tank, I added a vertical 2x4 brace and used metal fasteners:

 To ensure that the pressure of the 300 gallons will not push the sides out, a couple of galvanized bars would be added after the pond liner was installed. I used a router to let these into the 2x4s, so that I would preserve a flat surface for the top for easier sealing of the tank.
 I painted the bars with Rustoleum — but in the hot moist environment of the tank, one of the bars started rusting pretty badly after a few weeks — so I later had to remove the top plates and replace the galvanized with 1/8" thick aluminum. Here's the rust that appeared on one of the straps after just a few weeks:
 Later on, after replacing the steel straps with aluminum:

 2" polyisocyanurate foam insulation sheets are glued and braced on the interior — bottom and sides. I used 4x8 sheets recycled from a roofing job. Polyisocyanurate has a higher heat rating than regular polystyrene foam — important for inside the tank. This material can be found at most building supply stores under various trade names (including, I believe: Celotex GA3000 or Tuff-R, Kooltherm, Atlas R-Board, Thermax), but check to be sure.
 A large sheet of EPDM pond liner was cut to size for the tank (be careful to calculate the size you will need before cutting). Folding the heavy material into the corners is a bit tricky, but the material is forgiving and if you make some big folds at the corners — kind of like wrapping a present — it works out alright. I used clamps on the sides to keep the material where I wanted it while Sherry and I worked on the corners:
 Looks messy, but folds like this are good enough. It's important that you leave sufficient material in the tank so that the weight of the water will not be straining the fabric at the bottom and corners.

 The tank has two heat exchangers — one 300 ft of 1" pex-al-pex, and the other 100 ft of 1/2" flexible copper tubing.
The pex is for domestic hot water (DHW). The pipe holds almost 12 gallons inside its length, which generally has ample time to rise to the full temperature of the tank (target is 140 degrees) between uses — showers, clothes washing, dishwasher. As such, the water that reaches the backup propane hot water heater will often be fully pre-heated, so the burner will not come on. (Depending on how I decide to use the harvested heat in the winter with the radiant floor, it may be that the tank stays a lot cooler than that in the winter — but I figure that any solar BTUs that are utilized are worthwhile, regardless of how I apportion them. Spring through Fall, I expect the tank to at its maximum design temperature most of the time.)
The copper allows for quicker heat transfer, and will be hooked up to the radiant floor heating system as pre-heat.
I made the coils so that the copper coil is tighter and fits inside the pex coil.
The pex-al-pex came in a coil of larger diameter than I needed, so we had to form it into a tighter coil. Pex-al-pex (with a thin layer of aluminum sandwiched between pex layers) is known for maintaining its bend much better than regular pex. But this is a matter of degree — it was still a challenge convincing it to stay more tightly wound:
 At first we tried taping the tighter coils as we went, but that was too much of a hassle:
 In the end we used two people — one to hold the tighter coils in place while the other turned and bent the larger coil into a tighter curve. It was amazingly sweaty work, a lot of wrestling with the pipe, like playing an intense game of Twister:


 The pex-al-pex still wanted to move partially back to its old shape by the next day. So we tightened the coil more than once until it finally settled down.
The copper tubing was easier, as it holds its shape. I grabbed a 5 gallon bucket as a mold, and we just wrapped it around:

 When we got to the top, we just added a second bucket and kept going:
 In the end, it looked like a spool of thread with a big copper needle attached:
 I inserted the copper coil inside the pex coil, and maneuvered it into the tank. At this point, the tank had one of the galvanized bars bolted on — the other was left off to allow the coils to get in:
 I did not want the coils to end up at the bottom of the tank, since the hottest water will be at the top, so I suspended them from the ends of the tank and from the support bars with heavy electrical wire. I also used small pieced of romex around every other turn of the pex coil to keep them slightly separated to allow better heat transfer from the water:
 The pex-al-pex actually came in one 200 ft and one 100 ft roll, so I had to splice them with a compression fitting:
 I decided to add two more inches of foam insulation to the outside of the tank, for a total of 4" on all sides and the top. The tank also rests on a 1" foam board on the concrete floor — so it has 3" of foam at the bottom. Here I am bracing the outer foam to let the adhesive set:
 I rented a big hammer drill to drill through the concrete wall in the basement. This place only had a solid 2 1/4" carbide bit, not a core bit — but it went surprisingly easily. In fact, I had to drill another set of holes later, lower down, and that time I used a core bit — and it went at least as slowly as the solid bit, plus there was the hassle of having to empty the core bit from time to time.

 I drilled two holes partly overlapping to accommodate the two pipes. Here you see eerie blue daylight:
 The holes from the outside:
 Here is the plumbing that comes out of the tank. The 3/4" copper will connect to the backup hot water heater at one end , and at the other end to the 1" coil of pex-al-pex. The cold water coming into the house will pass through the pex-al-pex heat exchanger before going to the propane water heater. The 1/2" copper will connect to the in-floor radiant heat system at one end, and to the coil of 1/2" copper in the tank at the other end:
 Notice above that I have added a top plate all around the tank, to provide a flat surface for the tank top to seal against. I used treated deck lumber, 1-1/8" thick x 5-1/2" wide. I used that thicker lumnber so I could cut grooves in the boards to let the copper pipes through without cutting all the way through. The EPDM liner underneath it provided an uneven surface, because of all the folds. So I applied a bead of Great Stuff foam as a seal and then screwed down the boards. I also routed the top plates at the spots where the bolts on the metal support straps stuck up, so they would not hold the top plate up. And I cut grooves in the top plates for the copper pipes to sit in (again, to allow a flat top surface). Later I will caulk around the pipes in these grooves. After the top plates were on, I sealed around their inner edges with silicone caulk.
 Isolation valves on the 3/4" copper allow the tank to be bypassed if necessary (the 1/2" copper will have a similar bypass). I used Watts couplers, similar to Sharkbite, to go from copper to pex:
 Tying in to the existing propane water heater was also done with Watts connectors, one to copper and one to the incoming cold water line which was gray plastic tubing:
 I used 45 degree elbows at the lip of the tank, compression fittings to connect the pex-al-pex, and Sharkbite couplings to connect to the 1/2" copper in the tank.
 At the other end of the tank is the pump and the pipes that go to the collector. I used a U-tube arrangement to keep water in the line above the pump (to keep it primed between uses). There are isolation valves near the top of each end of the U-tube.
 I had an old Grundfos 15-42 bronze pump left over from our radiant floor system. It was a sweat connection, so I used Sharkbites to make it removable. (As I say in the Lessons Learned section, I had to replace this pump with a larger one later to get sufficient flow through my long runs of 3/4" CPVC to the collector.)
 On the collector side of the U-tube, I added a hose bib for two reasons. (1) It allows the U-tube to be filled with water to prime the pump — by closing the ball valve above it, opening the other, and attaching a hose. (2) It allows me to send water through the collector at city water pressure — via a garden hose, by opening the valve above the hose bib and closing the other one — which was useful when I was diagnosing some problems.
 The copper supply line draws water from near the bottom of the tank. The copper return line drops water above the water line (which is critical for a drainback):
 I used Sharkbite elbows at the basement opening between CPVC and pex:
 Here are the short pex runs from the CPVC to the tank. I used some foam insulation to keep the pipes away from the concrete (cold in winter). I connected the pex to the copper tank plumbing with Watts couplings, similar to Sharkbite, which proved very handy as I had to connect various things there as I did system tests.
 When I first filled the tank, I saw that the pex-al-pex coil was going to float. Even with water in the coil it is a little lighter than water:
 So I added a pvc pipe just to keep the coil a bit below the metal straps, and below the final water line (here the water was not all the way up yet):
 The top of the tank is a sheet of EPDM, facing the water, glued to a sheet of 2" polyisocyanurate foam (better heat stability) glued to a sheet of 2" polystyrene foam, glued to a sheet of 3/8" plywood. I will screw it down with long hex lag bolts and big fender washers. Keeping the lid tightly sealed will reduce evaporation and heat loss. It's amazing how much steam comes off a tank of water at 160 degrees.
 The white cpvc pipe emerging from the tank lid, at the rear in the photo, fulfills a few functions:
 Next page (Trench) >>